
In this guide, we are going to talk about custom fish tank decorations. Basically, I will show you how I up’d my fish tank game with real wood, a piece of slate, and a few plants.
Okay, let’s do it.
Custom Fish Tank Decorations Will Make Your Tank Pop
If you are tired of buying the fake pink plants, Disney castles, and pyramids for your fish tank at PetSmart, this little guide will be exactly what you need for quickly making your tank look freaking amazing. This guide will be great for anyone in the fish tank hobby. Even a beginner can make this happen.
When I first got started with fish tanks, I always went for the fake stuff (one of my tanks still has the fake stuff). This was at first because a) I was probably too lazy to build out a real tank, and b) I had blue crayfish. And, blue crayfish destroy everything they can. It’s just part of being a crayfish—those little monsters.
When I upgraded my tank to a 36-gallon tank, I started down the same road. Yes, I thought I was going to be keeping crayfish that would destroy any real plants and make them look horrible. So, at first, I did the whole faky faky plants and the faky faky ornaments thing.
But, after visiting a killer local fish store to buy some stuff for my other tank, it hit me. I needed to upgrade the look of my new tank.
Every single tank in this store was set up like a piece of artwork. They were like little masterpieces made of wood, rock, water, and, oh yeah, fish.
After seeing these tanks, I thought, “Okay, I have to take my tank up a notch. No more plastic.”
So here’s what I did.
Custom Fish Tank Decorations: What You Will Need
For this custom fish tank decoration project, you are going to need the following:
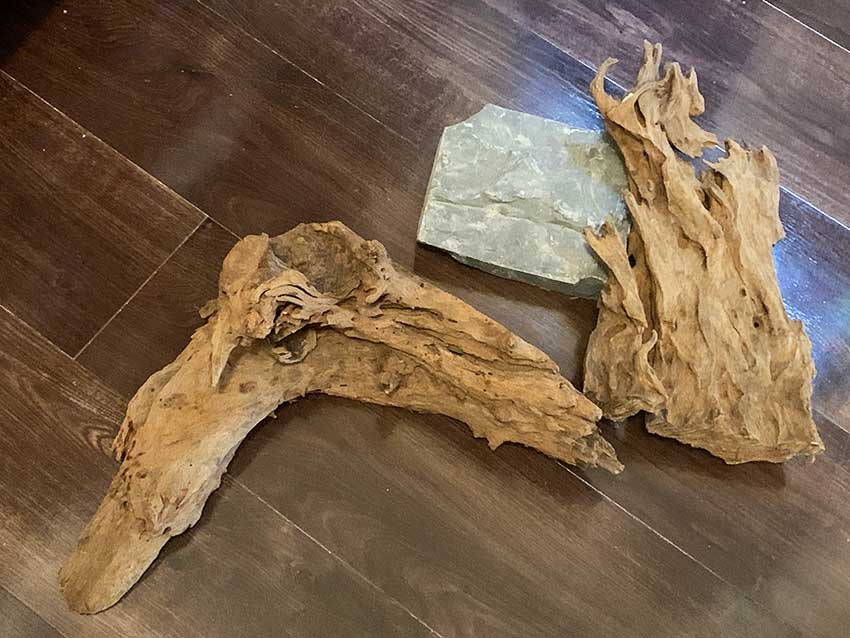
- Some nice and dried-out wood for your centerpiece. You might even want to get two pieces. I did.
- You will also want to get a flat rock of some sort, preferably slate.
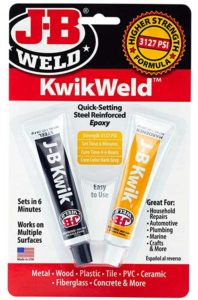
- And, you will want to make a trip to the store for some JB Weld. (Careful, that stuff is strong!)
Step 1: Design It
This step is pretty simple. You don’t have to be an architect to make your fish tank look pretty badass. However, you do need to draw out some basic designs. You want to have a plan to follow and a direction.
Step 2: Add in Some Plants
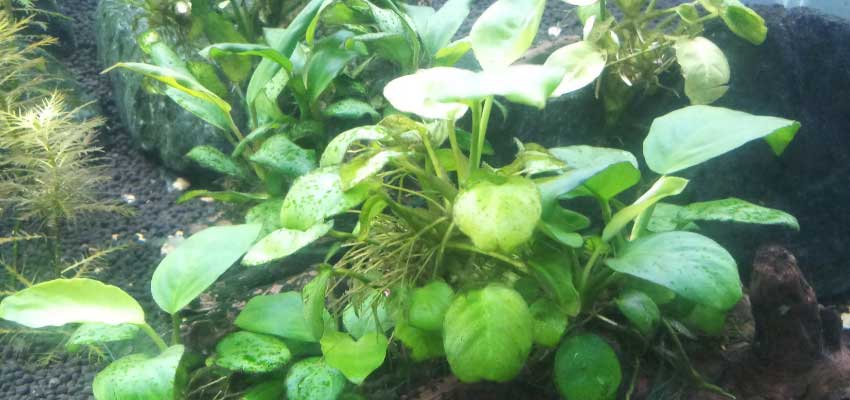
Before you get started with your custom fish tank decoration, and after you have made a basic plan for what you want, you will want to add some plants. I would suggest java moss or Christmas moss, java ferns, and anubias. These all are relatively easy plants to keep in your aquarium.
Now, remember, as you lay out your plants in your tank, keep in mind that your centerpiece will go, well, in the center of your tank. Actually, you can put it wherever you would like, but be sure that you don’t have plants in the way.
I’d also recommend having some fine black gravel as a substrate. This is kind of a personal choice, but I tend to think it makes adding and securing the plants easier. Note, the plants mentioned above don’t require any particular substrate.
Step 3: Choose the Right Wood for Your Fish Tank
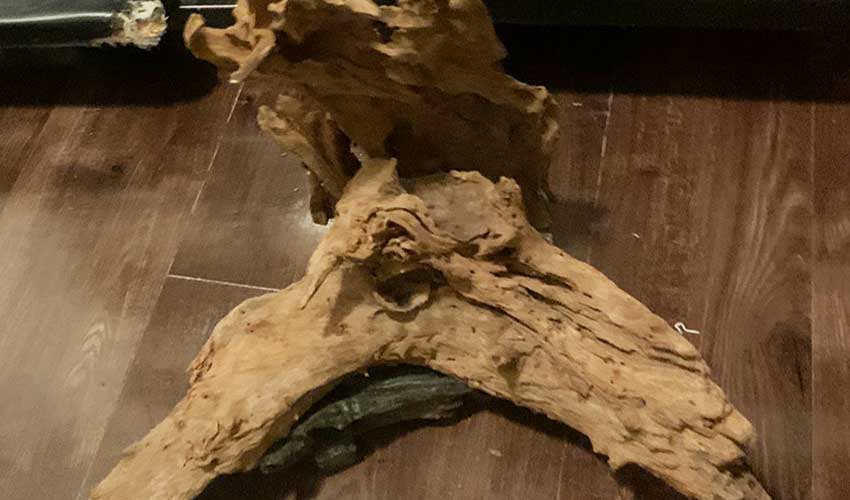
When you pick out the wood that you want to use for your custom aquarium decoration; you want to pick out some nice driftwood. You will probably need to go to a specialty fish store to find this. Of course, you may be able to find some dried-out driftwood somewhere else, too.
As you peruse the wood selection, look at things in the wood like grooves, holes that could be used as hideouts, and curvature. All of these types of things will add to the visual appeal of what will soon be a significant focus of your tank.
When I bought the driftwood for my tank, I purchased a piece to go horizontal and a portion to go vertical.
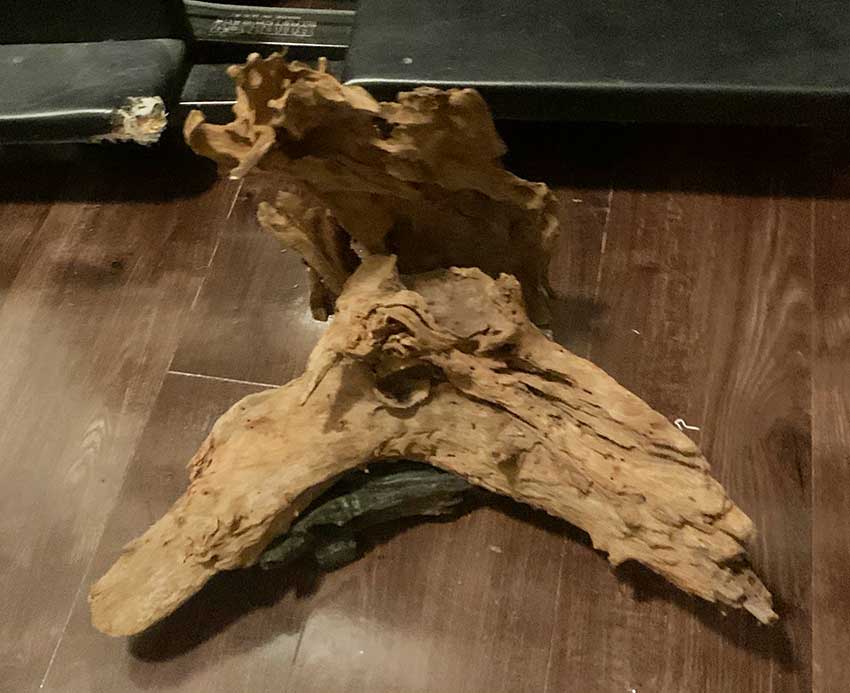
Step 4: Grab You a Little Slab of Rock
Okay, for this project, you will need a small slab of slate. Make sure it’s heavy enough to hold down the driftwood. That’s important.
Step 5: Glue it All Together
Now, this next part is where the magic happens. This is where your custom fish tank masterpiece comes together. I mean, you are literally putting it together with glue.
For this step, you will need JB Weld. This is an industrial-strength glue. It’s extremely strong and waterproof. You could glue a piece of jello to the bottom of the ocean with this stuff. But, why would anyone want to do that? Anyway, make sure you are careful with JB Weld, so you don’t glue yourself to a piece of driftwood and have to be cut free with the jaws of life.
Put it All on the Slab
Place your slab of slate on its flattest side on the floor. I would suggest you put it on a towel or piece of plastic, so JB Weld doesn’t get somewhere it doesn’t belong.
By now, you should have your plan for how you are going to glue your custom fish tank piece together.
The JB Weld glue has two parts. You will need to mix them both together on the surface of the slate and then immediately place your driftwood in that spot. If you have multiple pieces of driftwood, well, you will have to all of them. In some cases, you may have to glue different sections at different times.
If you need something to hold your glued pieces in place, you can use zip ties, clamps, etc.
Depending on what type of JB Weld you use, you’ll have to wait several hours for the glue to harden, securing the pieces together entirely. JB Kwik dries pretty fast, in about 4 to 6 hours. This is the glue I used for my little gem. But, just for safe measure, I let mine sit for about 12 hours.
After the glue dries, you now have your custom fish tank decoration. You can upload pics of it to Facebook to impress your friends, and you can also now add the piece to your aquarium to impress your fish. But, a little more on that part.
Step 6: Adding your Custom Piece to Your Tank
Okay, Picasso, your custom-made aquarium piece is done. Now you have to place it in your tank. Here is my suggestion on how to do this.
First, drain the water in your tank down a bit like you are doing a water change. You want to get it low enough to where you can work within the tank, but you don’t want to drain so much that it offsets the balance in your tank. Drastic water changes can be a bad thing.
Now, for the easiest part (kind of). Carefully lower your custom fish tank decorative masterpiece into your tank. Once placed, I suggest covering the edges of the slate with gravel from your aquarium. You may need to add more.
From here, you may see how adding more plants might enhance the look of your decoration and tank. So add more plants if you’d like.
Finally, take a step back and shake your hand, you aquascaping Salvador Dali. You’re done!
Get Started